
3d Modelling on Fusion 360
AutoDesk
1. Sketch
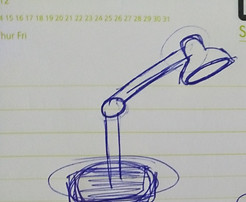
Sketch the item you want to 3d model. Just a brief conceptual design would do it.
Firstly i chose a desk lamp but had some issues with drawing joints so switched to a bedroom fixed lamp
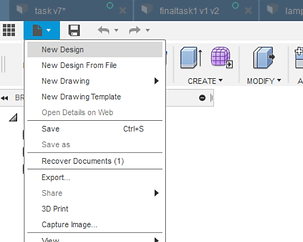
2. Open Fusion and start drawing
File>New Design
A new untitled tab will open, You can start drawing by w cylindrical shape
Create>Cylinder

3.Draw the base - Cylinder
Go to create>Cylinder>place the cursor where you want to draw.
I placed the it in base bottom of the 3 axis.
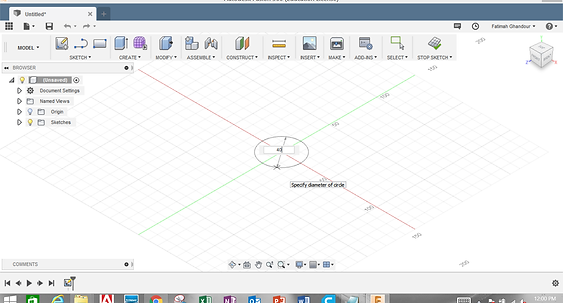
Lastly, enter the height of the cylinder i entered 20 mm.

this is the cool part in drawing the base how to make the edges so smooth?
Go to Modify>Fillet just select the surface of the base and move the along the arrow. The smooth edges shape changes with moving, stop when you feel like its how you wanted to look like.


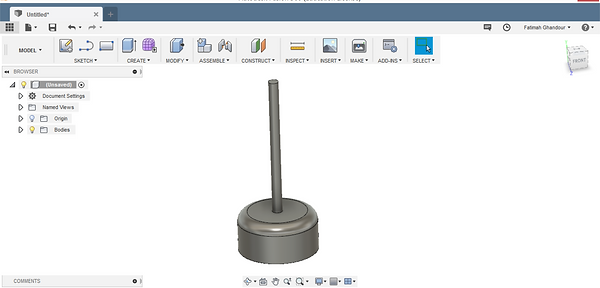
Go to the Top view to see your base all through and to add the stick that holds the base with the lamp. Create>Cylinder choose the base as the plane to draw and enter the size of the stick i made it 5.00 mm, Lastly enter the height i chose it to be 60 mm
This how you see the stick from a side view.
4.Lets do the head of the lamp
Go to Assemble >New Component
you have to make a new component to assemble if u skipped this step which i did :D you will not be able to assemble the two bodies and join them, fusion will consider all parts as a one body.


Here we go again, Create>Cylinder
this time a bigger diameter 60 mm and height 100 mm
As u see your previous work is transparent so you can focus on your current piece.
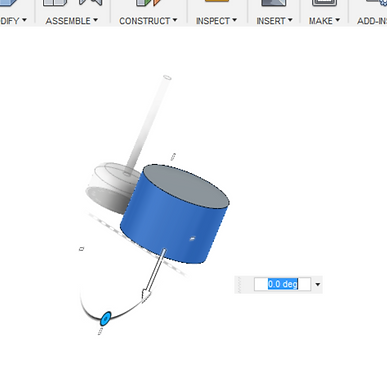
Now i want to reshape the cylinder as an incomplete cone. Go to Modify>Chamfer
fusion will ask you to select the planes to be modified i first tried to do it from the top plane but it didn't workout. So go to your bottom view and select plane, move your view a little to select the perimeter of the cylinder. In the chamfer process an arrow and a moving circle will appear. By moving the ball around a degree box will appear and the shape will start to get where you want. You can either stop whenever you feel satisfied with the shape or make it to -25.00 degrees

Now the part is ready to out fill it.
Select the part>Modify> Shell
This also is a cool tool :D make sure to select the part from bottom and side surface to make sure fusion understands where you want to remove the fill.
Another arrow will appear and we will just drag it along and stop whenever the shape looks satisfying.
Here is how it looks like ↓↓↓


To Assemble the whole lamp just select the planes to be combined together and Go to Modify>Combine. This how it looks like completely steel and awkward.
4.Appearance and Colors
Select the plance to changer appearance right click it > Appearance
you'll get the settings and library for materials i chose a fabric for that piece to make it look more real.
and gold steel for the base and stick.
you can improvise, like go for a wooden base pick from different shades :)
Click on material> drag it to the surface you want.
Here we go!

5. Render and Save
Model>Render
The model will be rendered and will look different.
